Syncing Worker Photos from Oracle HCM to APEX (Local Table Approach)

Oracle HCM Cloud provide REST APIs to retrieve worker images, but fetching these live for a large workforce can cause page latency. By using a local table synchronization strategy, organizations can display high-performance employee galleries in Oracle APEX with seamless “silhouette” fallbacks for missing data.
Pre-requisites
- Oracle APEX (23.x or later recommended)
- REST Data Source or PL/SQL API access to Oracle HCM
Required Grants:
- CREATE TABLE, CREATE PROCEDURE
- APEX_WEB_SERVICE package access
Introduction
In large-scale Oracle ERP/HCM implementations, displaying worker photos in custom APEX applications can be a performance bottleneck if handled through live REST calls. This guide demonstrates how to build a robust “Local Sync” architecture to ensure sub-second page loads and a professional user experience.
Part 1: Dat a Foundation & Connectivity
STEP 1: Create a Local Table for Worker Data.
We begin by creating a staging table to hold core worker attributes
(Person number, Person ID). This acts as our “Source of Truth” within the
local database.
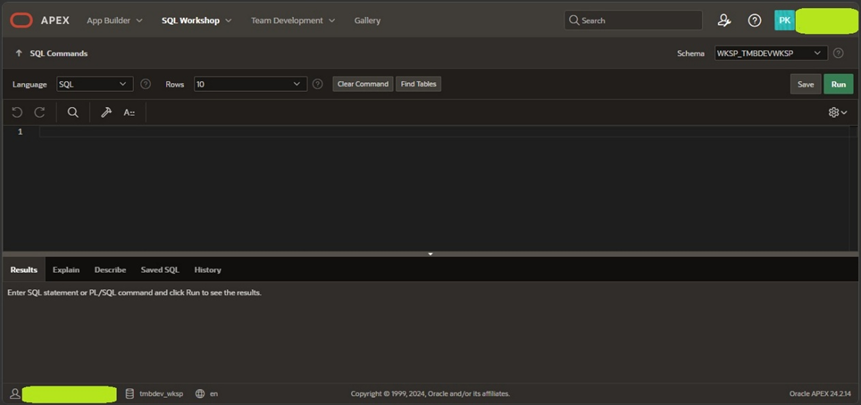
NAV -> Login into you APEX workspace -> SQL workshop -> SQL commands -> Run below SQL query.
Query :
CREATE TABLE “ALL_TMB_WORKERS_TEST” (
PERSONID NUMBER GENERATED BY DEFAULT ON NULL AS IDENTITY,
UNIQUE_ID VARCHAR2(100),
PERSONNUMBER VARCHAR2(30),
APPLICANTNUMBER VARCHAR2(30),
BLOODTYPE VARCHAR2(5),
DATEOFBIRTH DATE,
DATEOFDEATH DATE,
TOWNOFBIRTH VARCHAR2(100),
REGIONOFBIRTH VARCHAR2(100),
COUNTRYOFBIRTH VARCHAR2(100),
CORRESPONDENCELANGUAGE VARCHAR2(10),
CREATEDBY VARCHAR2(255),
LASTUPDATEDBY VARCHAR2(255)
CONSTRAINT ALL_TMB_WORKERS_TEST_PK PRIMARY KEY (PERSONID) );
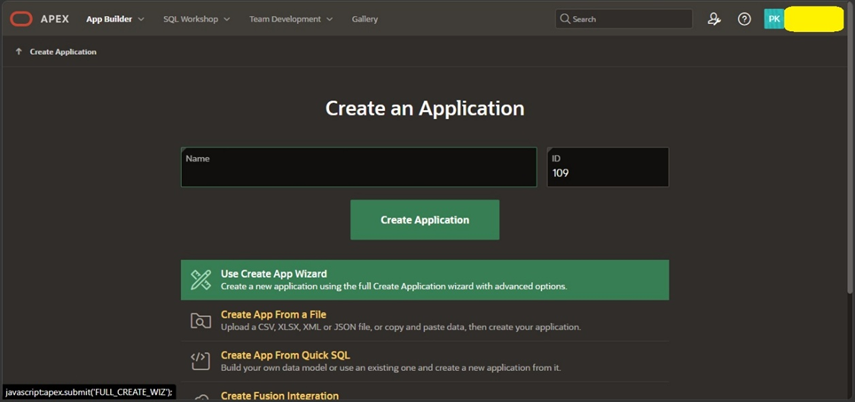
STEP 2: Create the APEX Application.
Initialize a new application container in Oracle APEX to house our
synchronization logic and the final display gallery.
NAV -> login into our APEX workspace -> App builder -> Create
STEP 3: Create Web credentials.
Create Web credentials to access the Fusion environment. Here you need to provide
actual user name and password of fusion environment.
NAV -> Open your application -> Go to shared components -> Credentials ->Create ->
fill the requirements.

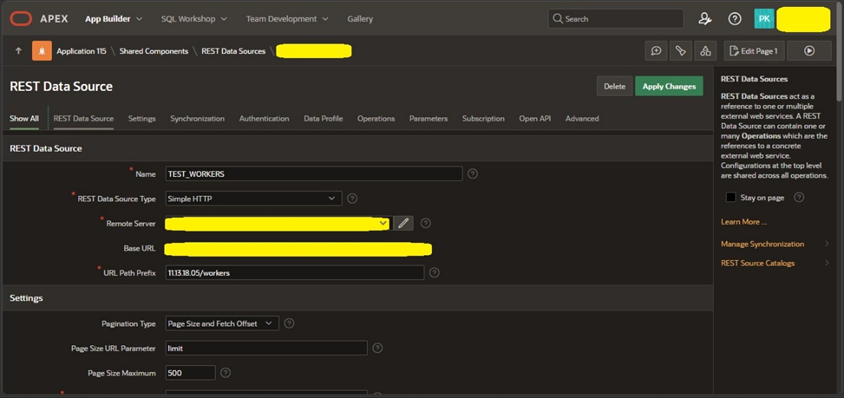
STEP 3: Configure “Get All Workers” REST Source.
Define a REST Data Source using the Oracle HCM Cloud “Get All Workers” endpoint.
This allows APEX to communicate directly with the Cloud environment.
Add your Fusion Environment url Infront of endpoint.
END POINT : /hcmRestApi/resources/11.13.18.05/workers
NAV -> Open your application -> Go to shared components -> Rest data source -> Create.
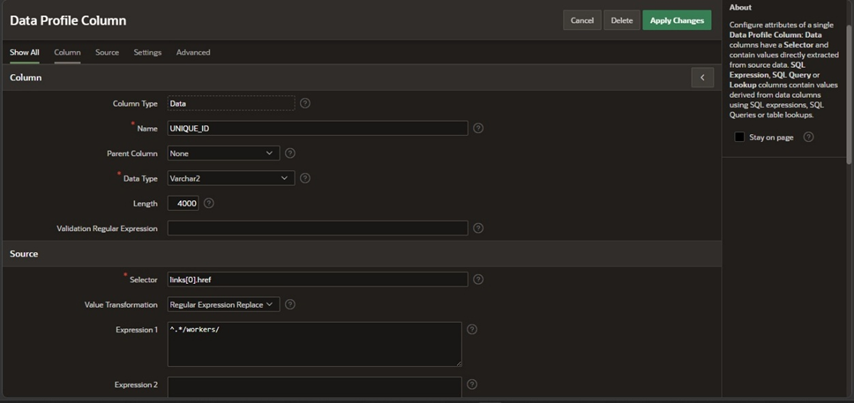
STEP 4: Generate the Unique ID Derived Column.
Within the REST Source Data Profile, create a Derived Column. This ensures
every worker has a consistent, unique identifier (like PERSON_ID) used to
map photos to the correct employee record.
Steps to create derived column:
-> Open your Rest Source
-> Go to data profile
-> Edit data profile
-> Add column
-> give column name, data type, selector, value transformation, expression 1.
Part 2: Synchronization Logic
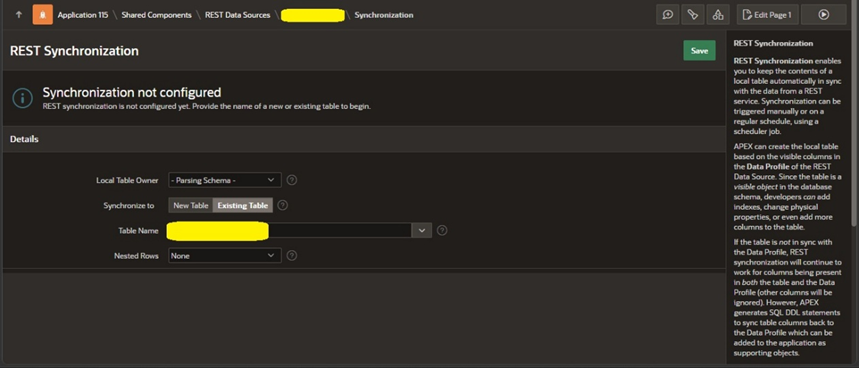
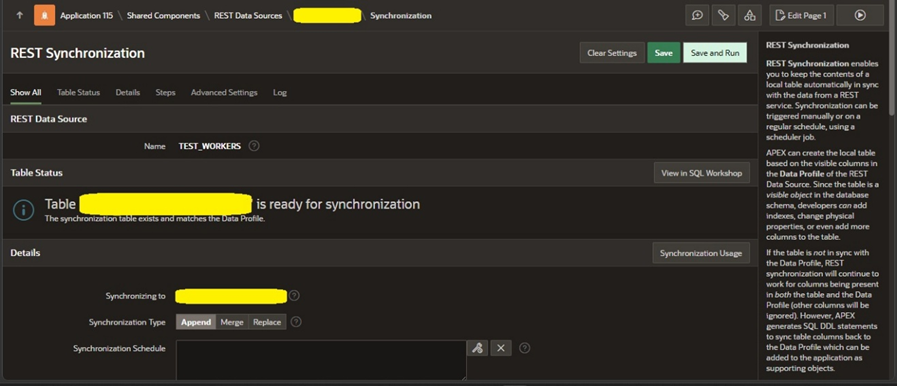
STEP 5: Sync REST Source with Local Database.
Use the REST Synchronization feature in APEX to automate the flow of data from
the HCM Cloud into the local table created in Step 1.
NAV -> Open your rest source -> Manage Synchronization -> Synchronize to -> Existing table -> Select your table -> Click save à Run Synchronization.
STEP 6: Configure “Get All Worker Photo” REST Source.
Create a second REST Data Source, specifically targeting the photo endpoints.
This source will handle the retrieval of binary data or Base64 strings.
NAV -> Open your application -> Go to shared components -> Rest data source -> Create.
STEP 7: Create a Local Table for Photo Data.
Define a specialized table to store the IMAGE_BLOB, MIME_TYPE,
and PERSON_NUMBER. Storing these locally prevents repeated, slow API calls.
NAV -> Login into you APEX workspace -> SQL workshop -> SQL commands -> Run below SQL query.
Query :
CREATE TABLE “TMB_WORKER_PHOTOS” (
PHOTO_ID NUMBER GENERATED BY DEFAULT ON NULL AS IDENTITY,
UNIQUE_ID VARCHAR2(100),
PERSON_NUMBER VARCHAR2(30),
IMAGE_BLOB BLOB,
MIME_TYPE VARCHAR2(100) DEFAULT ‘image/jpeg’,
FILE_NAME VARCHAR2(255),
LAST_SYNC_DATE DATE,
STATUS VARCHAR2(20),
CONSTRAINT TMB_WORKER_PHOTOS_PK PRIMARY KEY (PHOTO_ID),
CONSTRAINT TMB_WORKER_PHOTOS_UK UNIQUE (UNIQUE_ID));
STEP 8: Develop the Conversion PROCEDURE.
Write a PL/SQL procedure to process the data. This procedure handles the
complex task of converting incoming text strings into permanent BLOB images
using APEX_WEB_SERVICE.CLOBBASE642BLOB.
NAV -> Login into you APEX workspace -> SQL workshop -> SQL commands -> Run below SQL query.
Query :
CREATE OR REPLACE PROCEDURE sync_worker_photo_batch (
p_person_number IN VARCHAR2,
p_unique_id IN VARCHAR2
) AS
l_response CLOB;
l_photo_base64 CLOB;
l_blob BLOB;
l_count NUMBER;
BEGIN
l_response := apex_web_service.make_rest_request(
p_url => ‘https://tmbhcm-iacciz.fa.ocs.oraclecloud.com/hcmRestApi/resources/11.13.18.05/workers/’
|| p_unique_id || ‘/child/photos?onlyData=true&orderBy=LastUpdateDate:desc’,
p_http_method => ‘GET’,
p_credential_static_id => ‘tmb_prod’
); — <— FIXED: Added missing ) and ; here
apex_json.parse(l_response);
l_count := apex_json.get_count(p_path => ‘items’);
IF l_count > 0 THEN
l_photo_base64 := apex_json.get_clob(p_path => ‘items[1].Photo’);
l_blob := apex_web_service.clobbase642blob(p_clob => l_photo_base64);
MERGE INTO TMB_WORKER_PHOTOS t
USING DUAL ON (t.UNIQUE_ID = p_unique_id)
WHEN MATCHED THEN
UPDATE SET t.IMAGE_BLOB = l_blob, t.STATUS = ‘FOUND’, t.PERSON_NUMBER = p_person_number, t.LAST_SYNC_DATE = SYSDATE
WHEN NOT MATCHED THEN
INSERT (UNIQUE_ID, PERSON_NUMBER, IMAGE_BLOB, MIME_TYPE, STATUS, LAST_SYNC_DATE)
VALUES (p_unique_id, p_person_number, l_blob, ‘image/jpeg’, ‘FOUND’, SYSDATE);
ELSE
MERGE INTO TMB_WORKER_PHOTOS t
USING DUAL ON (t.UNIQUE_ID = p_unique_id)
WHEN MATCHED THEN
UPDATE SET t.STATUS = ‘NO PHOTO’, t.PERSON_NUMBER = p_person_number, t.LAST_SYNC_DATE = SYSDATE
WHEN NOT MATCHED THEN
INSERT (UNIQUE_ID, PERSON_NUMBER, STATUS, LAST_SYNC_DATE)
VALUES (p_unique_id, p_person_number, ‘NO PHOTO’, SYSDATE);
END IF;
COMMIT;
END;
Part 3: Execution & Visualization
- STEP 9: Run the Sync Script and Procedure.
Execute the data synchronization followed by your PL/SQL procedure.
This populates your local photo table with high-resolution images ready for display.
NAV -> Login into you APEX workspace -> SQL workshop -> SQL commands -> Run below SQL query.
Query :
DECLARE
l_offset NUMBER := 3170;
l_limit NUMBER := 50;
BEGIN
FOR r IN (
SELECT PERSONNUMBER, UNIQUE_ID
FROM ALL_TMB_WORKERS_TEST
ORDER BY PERSONNUMBER ASC
OFFSET l_offset ROWS FETCH NEXT l_limit ROWS ONLY
) LOOP
sync_worker_photo_batch(
p_person_number => r.PERSONNUMBER,
p_unique_id => r.UNIQUE_ID
);
END LOOP;
DBMS_OUTPUT.PUT_LINE(‘Successfully checked 50 workers starting at offset ‘ || l_offset);
END; - Here you need to set off set value
- To do 1-10: Set l_offset := 0.
- To do 11-20: Set l_offset := 10.
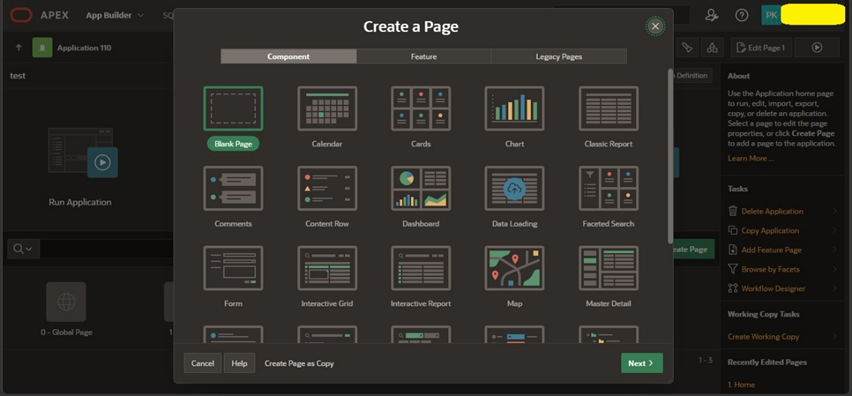
STEP 10: Create a Blank Viewing Page.
In the App Builder, create a new blank page that will serve as the
“Worker Directory” or “Photo Status” dashboard.
NAV -> Open your application -> Create page -> Select blank page.
STEP 11: Implement the Cards Region.
Add a Cards Region to the page.
Map the TITLE to the Person Number and the MEDIA source to your
local IMAGE_BLOB column.
NAV -> Open the blank page v Click on Body -> Create new region -> Select cards.
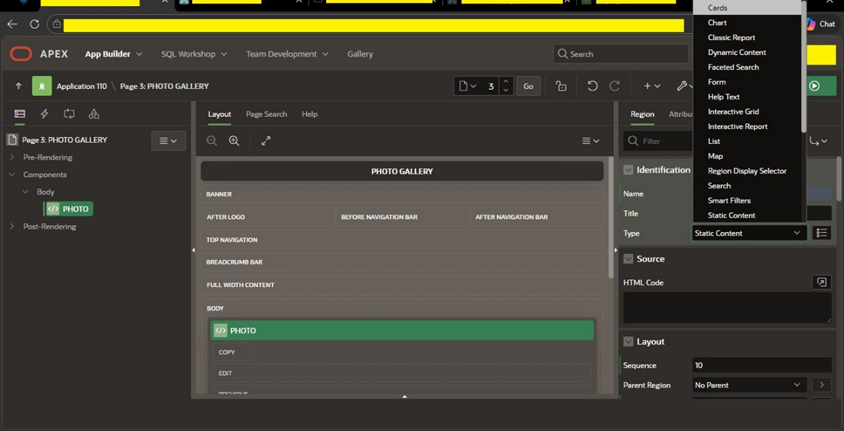
For crads region select source as local database, SQL query and write query according to your table. In attributes section set primary key column, tittle column, sub-tittle column, source as blob, blob column, Mime Type Column, Last Updated Column.
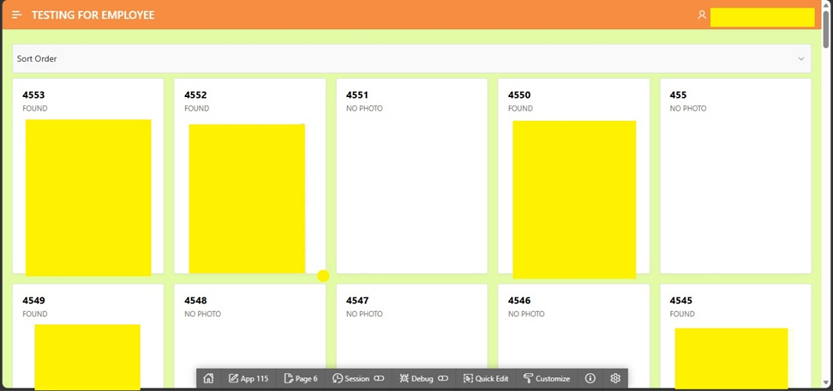
STEP 12: Launch and Validate Run the page.
The result is a fast and visually complete gallery that provides a “found” or
“not found” status for every worker in the system.
Business Benefits
- High Performance: No API latency during page rendering.
- Scalability: Easily handles 8,000+ records through batch processing.
- Robust UI: Maintains a professional look with placeholder images for missing data.
Author: Pavan Kalyan C
Oracle APEX Cloud Associate Consultant